
Gluten Free Cheese Scones – The Ultimate Recipe


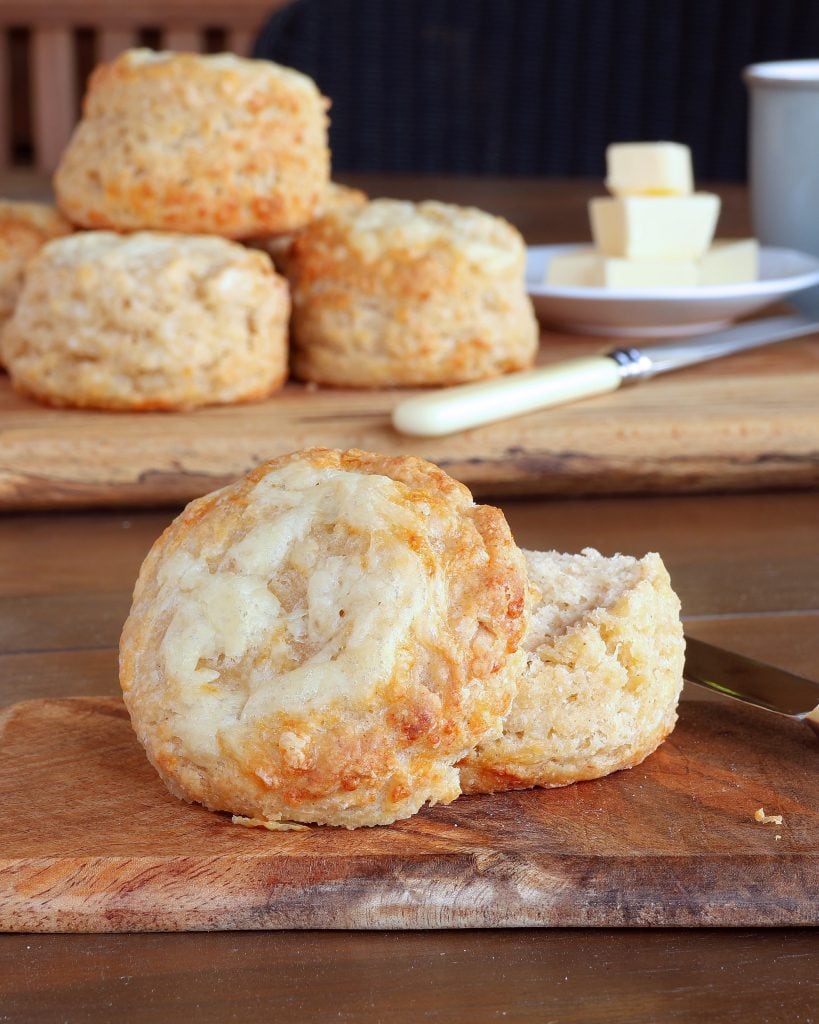
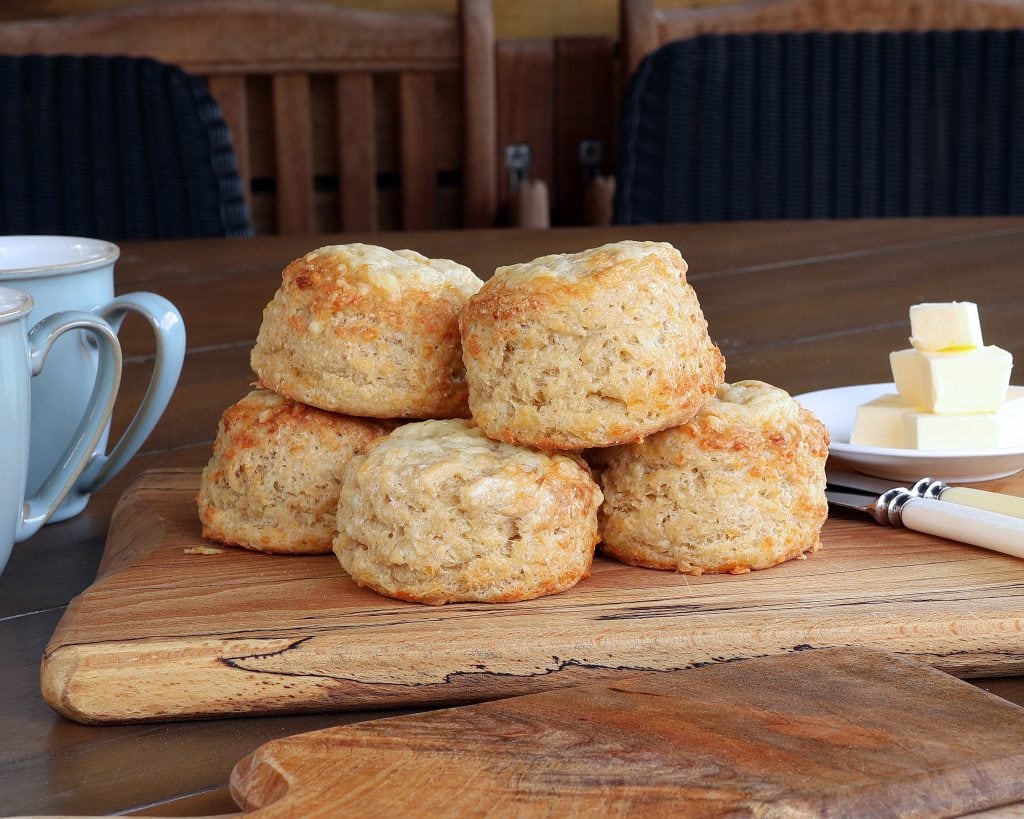
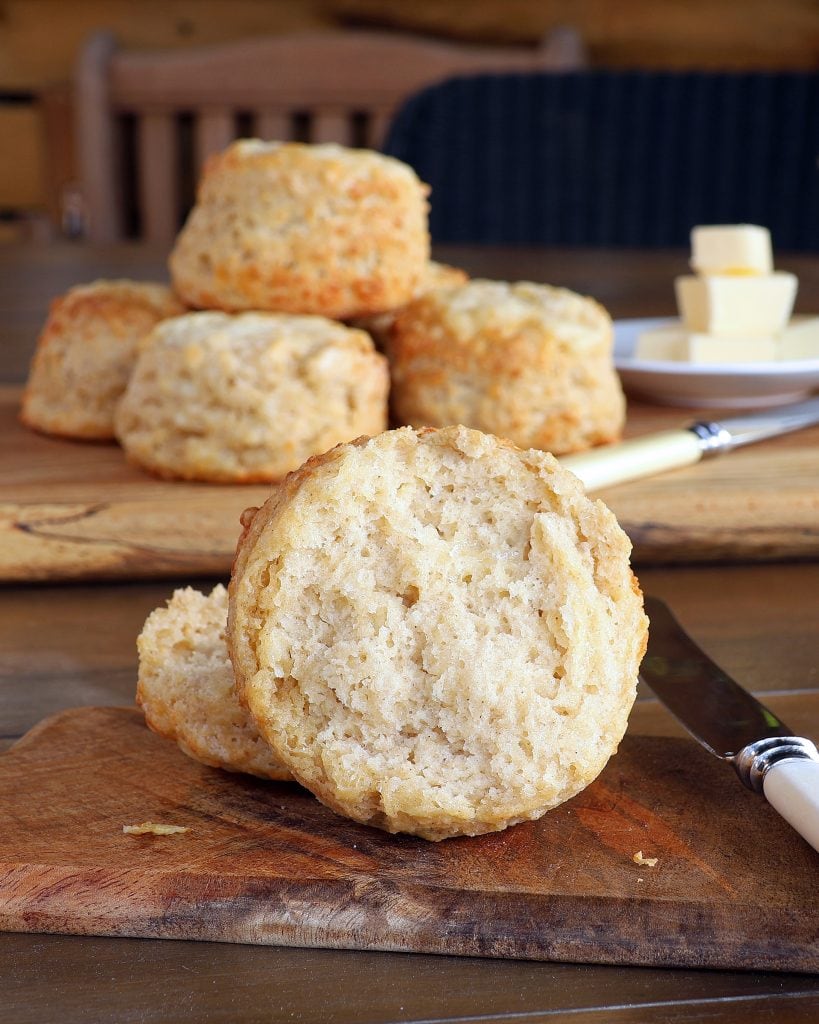
The ULTIMATE super-cheesy Gluten Free Cheese Scones 2026 reworked recipe for a perfect ‘just like wheat’ fluffy but gently bready texture, that will have you questioning whether they are really gluten and wheat free.
This post uses Affiliate links from which I may earn a small commission. As an Amazon Associate I also earn from qualifying purchases. Commission earned is at no extra cost to yourself. Thank you for supporting this blog.
PIN IT FOR LATER…

Forget all the other Gluten Free Cheese Scone recipes you’ve tried! Because THIS is a billion percent better than any you’ve tried before. It’s the Cheese Scone that outshines all others… Soft, fluffy, gently bready, stays fresh for a couple of days, deeply cheesy, better than wheat, mind-blowingly delicious!
Reworked 2026 BEST EVER Gluten Free Cheese Scones Recipe
Okay… That sounds like a brave claim. But I truly believe these are the BEST Cheese Scones (gluten free or otherwise) I have ever eaten. They’re so far ahead of any that I’ve previously made or bought, that I’m sticking my neck out on this one. And for anyone diagnosed with Coeliac Disease (Celiac), but too young to have any actual memory of what a wheat-scone tastes like, this is the recipe that will take you there. For the rest of us? Joyful nostalgia awaits!
If you’re a fan of my previous Gluten Free Cheese Scone recipe, you know my quest for the perfect scone has been many years long. But with my growing gluten free baking knowledge, it’s also my duty to the scone-eating Coeliac community to revisit even previous best recipes. And so it is… My Cheese Scones have continued to evolve and improve. And I’m confident you’ll love them!
Why you’ll LOVE these Gluten Free Cheese Scones
- The texture is INCREDIBLE… You cannot tell they are gluten free… AT ALL.
- They’re deliciously cheesy and divine eaten cold (or warm).
- Unlike most gluten free scones, they don’t turn into hard bricks as soon as they go cold. THESE Cheese Scones stay soft all day and beyond. Seriously… Even I was shocked at how fresh they were a full day after making.
- They’re safe for Coeliacs AND they’re wheat free too (no nasty gluten free wheat starch in here!)
- The dry element of the dough can be made and frozen ahead so you have a cheese scone ‘base mix’ ready when you want it.
- Although tested with my Gluten Free Alchemist flour mix recipes, they can be made with most gluten free flour blends, so the ingredient list is simplified.
- They’re so good, the whole family will enjoy them (although you may not want to share).
What happened to my old recipes for Gluten Free Cheese Scones?
I posted my very first gluten free cheese scones recipe back in 2013. Achieving anything that came close to a scone texture at that time was something to celebrate… And I was happy… Until 2016, when I re-worked and improved that recipe, amongst other tweaks, adding buttermilk.
It was a good recipe. But time moved on… and with new baking knowledge, there was another much better re-jig in 2021. For those of you who still want to make them, I have left the 2021 recipe at the very bottom of this post… for now. The 2016 recipe has been removed… It simply doesn’t ‘cut it’ anymore.
Why does THIS recipe work?
This gluten free Cheese Scone recipe is different from any other I’ve seen. It takes all the important learning from developing my Best Recipe Gluten Free Sultana Scones, with some extra reworks around hydration and structure that come with the addition of cheese. Unlike my previous cheese scones, this recipe uses an extra egg yolk, a gentle combination of xanthan gum and psyllium husk and a mix of home-made ‘buttermilk’ + drinking kefir (or yoghurt). I’ve ditched the bicarbonate of soda (baking soda) in favour of baking powder only (to remove any soda bitterness), and exploited ‘cold’ to ensure textural integrity and rise. The result is a scone that’s lastingly soft and fluffy, with a ‘just like wheat’ scone texture.
Ingredients for making Gluten Free Cheese Scones
Gluten Free Flour Blend
This recipe has been tested with both rice-free and rice-based gluten free flour BLENDS. All work well, with slight variations in texture and hydration depending on the amount of rice and starch in each blend. If using a rice-heavy blend (or if the dough feels on the dry side), it may help to add an extra 10 ml/g milk to compensate moisture levels.
My favourite results were using my incredible Gluten Free Rice Free Flour Blend B, the recipe for which can be found HERE 👆.
Psyllium Husk and Xanthan Gum
My new scone dough was tested with xanthan gum only, psyllium husk only and a combination of the two (at varying ratios). Neither of the ‘only’ tests produced a genuine scone texture. However in balanced combination (and alongside other ingredients as listed), the texture and structure was light and fluffy with a wonderful hint of ‘breadiness’.
For more information on psyllium husk and xanthan gum, head over to my posts:
Baking Powder and Salt
As mentioned above, this new scone recipe uses baking powder only as key leavening.
Once baking powder is wet, it becomes active… but over time, activity decreases however. As such, once the liquid ingredients have been added, it’s important to mix, rest, cut and have the dough scones in the oven within around 1 hour max.
Salt enhances flavour, but can be left out as preferred.
Block Butter
It’s important to use BLOCK butter to either grate (frozen) or ‘rub in’ to the flour. This process creates small flecks of fat which when baked, melt to create tiny pockets of air. These in turn support both rise and flakiness in the scones.
For a dairy free like-for-like alternative, I recommend using Flora Plant B+tter or Stork or Naturli vegan baking blocks in the UK.
Cheese for Gluten Free Cheese Scones
For the cheesiest of cheese scones, be sure to use a STRONG (sharp) hard cheese. In the UK, I use mature (or extra mature) Cheddar. But you can use Red Leicester, Gruyere, Comte or any other preferred alternative either in combination or on its own.
The cheese must be grated… preferably not too finely, for the best intensity of flavour.
‘Buttermilk’ and Kefir
My gluten free cheese scones use a combination of homemade buttermilk and runny drinking kefir to add moisture, tenderness and longevity to the crumb. The buttermilk is made from mixing milk with a little lemon juice. Because the combination of buttermilk and kefir increases lactic acid content, it also boosts carbon dioxide when acting alongside baking powder and thus gives a better rise and more airy texture.
If unable to obtain runny (drinking) kefir, substitute with runny yoghurt (‘live’ if possible) or switch out the full quantity of milk + kefir for commercial buttermilk, but still add the lemon juice in addition.
Eggs
These incredible gluten free Cheese Scones use whole egg + additional yolk. Trust me… the additional egg yolk makes ALL the difference to creating an authentic scone texture, stability and supporting rise without heaviness.
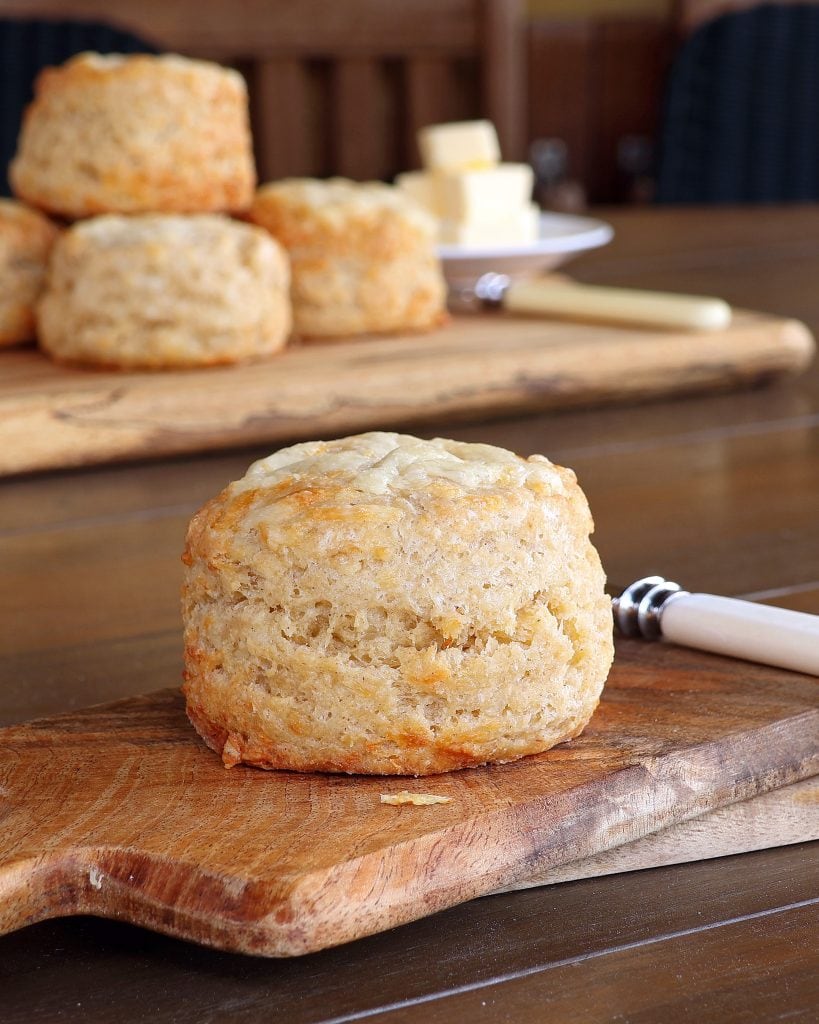
How to make the ultimate Gluten Free Cheese Scones – tips for success
Making cheese scones is a very simple process that is within anyone’s baking skills. But here are a few tips that will take them further and ensure you too can make them the ultimate Gluten Free Cheese Scones that everyone will remember!
Keep everything super-cold
When making scones, cold is truly your friend… Keep ALL the ingredients (including eggs), equipment, dough and hands as cold as possible throughout the dough-making process. For hot hands, use grated, frozen butter, OR cut the fat into the flour with a pastry cutter, OR ‘pulse’ cold, cubed butter into the flour with a blender.
While it’s not essential, if you have time, I advise you chill the mix of dry ingredients + butter + cheese in a freezer before adding the liquids. This ensures that when the liquids are added and the flour is hydrated, you ‘buy’ extra cold time for the butter flecks to stay solid (particularly in hot weather).
The flour-fat-cheese blend can also be frozen for up to 2 months for an almost ready-to-go ‘scone mix’.
Flour hydration is important (with care!)
Allow the flour mix to hydrate after liquid is added, but not for too long! Once wet, baking powder starts to work and consequently, over time, its activity is reduced… For best effectiveness, get scones rolled, cut and into the oven within about 1 hour of mixing.
Bear in mind that this gluten free cheese scone dough should also be sticky and ‘shaggy’… even after flour hydration. If the dough is too dry, it will create scones that are tough and crumbly. Do NOT add more flour (other than a light dusting to help shape and roll) and do not over-mix or over-compress the dough. Aim for something that can be shaped, but still has ‘imperfections’ in texture. This supports the maintenance of air pockets to support rise and a light, fluffy texture.
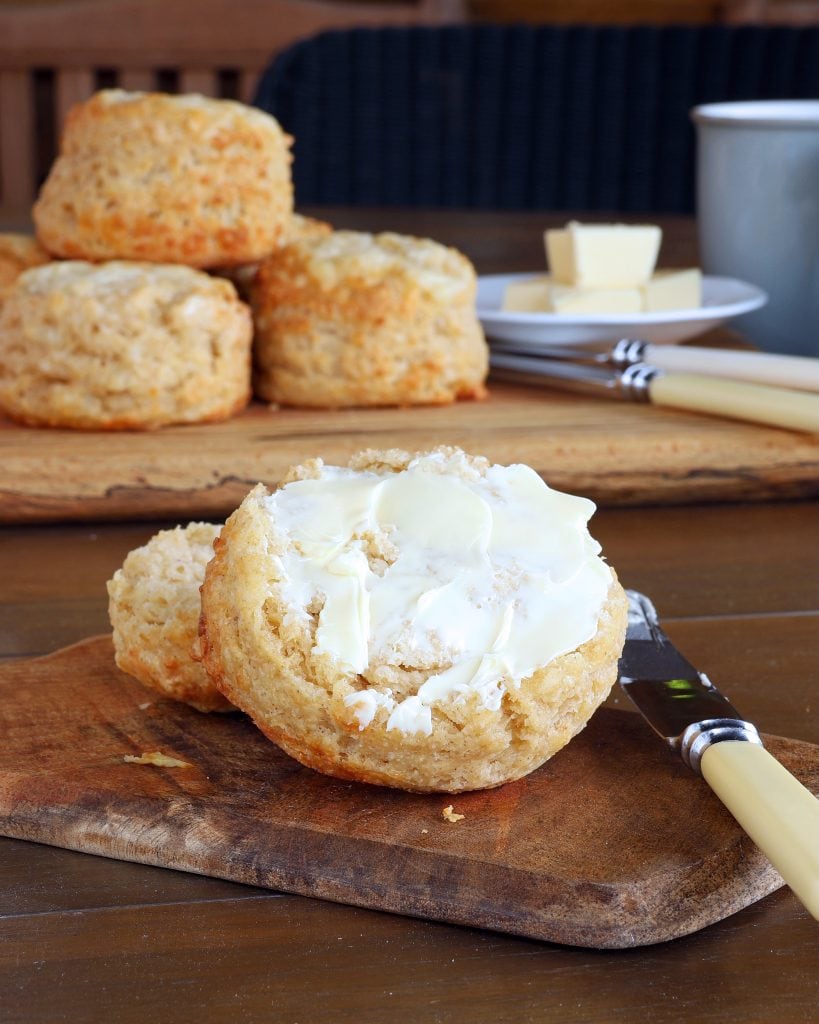
Cut straight and tall
To avoid compression and get a taller scone, cut tall, sharp and straight… Lightly flour the cookie cutter or knife to give a clean release. Use deep cutters, and cut straight down. This gives a flakier rise!
Once cut, egg-wash the scones for a golden finish (and to help extra sprinkled cheese stick to the surface). But be careful to brush the tops only. Glazed sides seal the dough and prevent it rising.
To bake cheese scones
My gluten free cheese scones can be baked on either a hot or cold tray as long as the oven is fully pre-heated. However, they are best baked on a hot baking-paper-lined tray that has been preheated with the oven.
Cut and glaze ALL the dough scones before removing the hot tray from the oven and then transfer them across to the tray and into the oven as quickly as possible (with the help of a spatula or palette knife). The immediate heat from the tray helps the scones to push upwards for a better rise.
How to store Gluten Free Cheese Scones
Scones are generally best eaten on the day they are made (whether or not they are gluten free). While the same can be said for these cheese scones, I was genuinely shocked at how soft and fresh they were on day 2. This recipe is absolutely ‘it’ and needs no further reworks. They should stay softly-edible for around 3 days!
For best freshness, store them (once fully cold) in an airtight container or bag. They maintain best softness at room temperature. However, if not to be eaten within a couple of days or if the weather is particularly hot, they can be refrigerated. If refrigerated, be aware that the texture will be firmer and the scones may need to be gently warmed in a microwave or oven to bring them back to their best.
To microwave: heat them at medium setting for around 15 to 20 seconds, or until you are happy they are a good temperature. Alternatively, wrap in foil and place in a pre-heated oven (around 180 to 200 C) for 8 to 10 minutes (or air fryer 5 to 8 minutes).
To freeze gluten free cheese scones: Once completely cool, place in an airtight bag or container and freeze for up to 3 months. Defrost and gently warm to enjoy them at their best.
I can also vouch that they’re divine cut and toasted!

Ready to make INCREDIBLE Gluten Free Cheese Scones?
Thank you for reading. I know you’ll love my ultimate Gluten Free Cheese Scones recipe. They’re the best gluten free cheese scones I’ve ever had… So, I really hope you enjoy them as much as we do.
Please let me know what you think. Leave a comment at the bottom of the post… Rate the recipe (so other people will find it too!)… And tag me on social media with your delicious scone pics…
(You’ll find me on Facebook, Instagram and Pinterest)
I’ve been asked a lot recently whether I have a recipe book. Sadly, I don’t. I’m simply not ‘big’ enough on social media for publishers to be interested. However… I do have a massive Gluten Free Recipe ‘Book’ Index… with hundreds of recipes to choose from. And all of them FREE to use. Let me know if you can’t find what you need.
Happy baking. And thanks as always, for visiting Gluten Free Alchemist

ULTIMATE Gluten Free Cheese Scones (2026)
Key equipment
- large baking tray
Ingredients
- 175 g/ml milk (dairy or dairy free)
- 15 g/ml lemon juice (= 1 tbsp)
- 310 g plain gluten free flour blend (tested with GFA Blends A, B & C)
- 1½ tsp xanthan gum (= 5½ g)
- 1 tsp psyllium husk powder – fine ground (= 2½ g)
- ¼ tsp fine sea salt
- 16 g baking powder (= 4½ tsp)
- 85 g hard block butter (or DF block alternative) – frozen and grated or chilled and cut into cubes
- 125 g mature/extra mature Cheddar cheese (or other hard strong cheese)
- 60 g drinking kefir (the runny variety) or dairy free alternative, or (preferably live) runny yoghurt
- 1 large egg (approx. 57g to 60g liquid weight) – chilled
- 1 egg yolk – chilled
Egg Wash and Cheese Topping
- a little egg/egg white and drop of milk for egg wash
- 30 g additional strong Cheddar cheese (grated) – or alternative hard cheese
Instructions
- Mix the milk with the lemon juice in a jug/bowl and stir. The mixture will start to look ‘curdled’ within a few minutes. This is now ‘buttermilk’. Place in the fridge to chill.
- Weigh and mix together the dry ingredients in a large bowl.
- Add the frozen grated butter and gently mix through until evenly distributed with no large lumps. OR add cold, cubed butter and rub into the flour until it has the appearance of coarse sand. (If prone to warm hands, a pastry cutter may help to keep the ingredients cooler).
- Add and stir through the grated cheese.
- It's not essential, but (particularly if the weather's hot) it's advisable to put the bowl in the freezer at this stage for around 20 minutes, to thoroughly chill the fat and flour.
- Add the cold kefir and egg + egg yolk to the ‘buttermilk’ and beat with a fork to combine.
- Make a well in the centre of the flour-butter mixture and add the liquid mix.
- Using a flat knife, mix and press the ingredients together until they form a sticky dough with no flour pockets.
- Cover and chill the dough for 20 to 30 minutes to allow the flours to hydrate. (This enables the dough to be shaped more easily and helps to retain moisture in the baked scones).
- Line a large baking tray with baking paper and place it IN the oven. (*See NOTES)
- Pre-heat the oven (and tray) to 200 C Fan/210 C/410 F.
- Lay a large piece of baking paper on the work surface and sprinkle lightly with gluten free flour/tapioca starch.
- Prepare the egg wash and set aside.
- After hydration, tip the dough out onto the floured paper and with flour-dusted hands (and a light sprinkling of flour on top of the dough), gently shape the dough into a block (do NOT knead). It should still feel sticky and look a bit ‘shaggy’. Do NOT be tempted to mix in more flour.
- Gently roll or press the dough to a depth of around 4 to 5 cm.
- Use a deep, floured cookie cutter (for large round scones: 3 inches/7 cm in diameter) or a fine-bladed, sharp, floured knife to cut the dough into rounds/squares. If cutting into squares, ensure ALL sides are cut (straight down) for the best rise and flaky scone edges. Place the dough-scones aside as you work.
- Bring any remaining dough together (being careful not to over-work) and repeat the cutting process, until all dough has been used (roll and hand-shape the last piece to avoid any wastage).
- Brush the top only of each scone with egg wash to glaze and sprinkle the tops with a little extra cheese.
- Carefully remove the hot tray from the oven and (working quickly) transfer the dough scones to the tray with the help of a palette knife.
- Bake immediately for 13 to 17 minutes (depending on size – 17 for large scones), until well risen and golden.
- Remove from the oven and transfer to a wire rack to cool.
- Eat warm or cold with butter, or use well-paired fillings (such as ham or tuna-mayo) to make a scone-sandwich.
- Best eaten on the day of making. But store leftover scones in an airtight container for 2 to 3 days. If necessary warm up in a microwave/oven/air fryer. OR freeze on the day of making.
Notes
Nutrition
© 2019-2026 Kate Dowse All Rights Reserved – Do not copy or re-publish this recipe or any part of this recipe on any other blog, on social media or in a publication without the express permission of Gluten Free Alchemist
IMPORTANT NOTE: The recipe BELOW is an older (2021) recipe that has been left on the blog post for people who have been using it for some time and wish to maintain access to it. The ABOVE recipe is the reworked, preferred recipe that gives a better, more ‘like wheat’ texture for a better cheese scone-eating experience.
Gluten Free Cheese Scones (OLD VERSION: 2021)
Key equipment
- Oven
- fridge
- measuring jug
- flat-bladed knife
- fork
Ingredients
Scone dough
- 95 g tapioca starch
- 80 g white rice flour
- 70 g oat flour (gluten free) grind oats to fine flour in blender if no oat flour available
- 40 g buckwheat flour
- 40 g sorghum flour
- 25 g corn starch (in UK = 'corn flour')
- 2 tsp xanthan gum
- ½ tsp fine sea salt
- 4 tsp GF baking powder
- 100 g unsalted butter cold and cubed
- 230 ml/g full fat milk
- 1 tbsp lemon juice
- 1 tsp bicarbonate of soda
- 140 g mature Cheddar cheese grated
- 1 large egg UK large (Canadian ‘Extra Large’; Australian ‘Jumbo’; and US ‘Extra or Very Large’)
Egg wash and cheese topping
- 1 egg lightly beaten with a fork
- 30 g mature cheddar cheese grated – to sprinkle on top
Instructions
- In a large mixing bowl, weigh and mix together the flours, xanthan gum, salt and baking powder, until all lumps are broken down and well-blended.
- With finger tips, rub the butter into the flour mix until it resembles coarse breadcrumbs. (for hot hands see NOTES)
- Chill the rubbed-in mixture in the fridge for at least 2 hours (and if possible over night).
- When ready to finish making the scone dough, mix the full fat milk with the lemon juice. Stir and leave to stand at room temperature for about 15 minutes to make homemade buttermilk (It should become grainy/lumpy).
- Base-line a large baking sheet with baking paper and place in the oven to heat.
- Pre-heat the oven to 200 C/400 F/Gas 6.
- Take the chilled flour-butter mix from the fridge and add the bicarbonate of soda and 140g portion of grated cheddar cheese.
- Beat the egg with a fork until blended and add to the mixture along with the homemade buttermilk.
- Gently stir the mixture using a flat-bladed table knife until it has become damp and clumpy.
- With lightly-floured hands, gently bring the dough into a ball and press lightly together (do not over-work or over-condense).
- Tip the dough onto a lightly-floured surface (I use straight GF flour blend).
- Gently press the dough down to form a flattened surface and very lightly sprinkle with flour to prevent sticking.
- Roll the dough out using a rolling pin to a thickness of about 4 to 5 cm.
- Using a round pastry cutter to the size of scones you require, cut the dough into rounds, by pressing straight down.
- As each scone is cut, set them to one side until ready to bake.
- Bring any remaining dough together and repeat the rolling and cutting process until all the dough has been used, trying hard not to 'work' the dough too much as you go.
- Using a pastry brush, glaze the top of each scone with beaten egg and add a sprinkle of the remaining cheese.
- When ready to cook, carefully take the pre-heated baking tray from the oven and (either by hand or with a spatula) quickly transfer the dough-scones to the tray, ensuring 2 to 3 centimetres space round each one for an even bake.
- Using oven gloves, put the tray back in the oven and bake for 12 to 15 minutes for medium-sized scones (or 16 to 17 minutes for large scones) until well-risen and golden.
- Remove from the oven and transfer to a wire rack to cool.
Notes
Nutrition
© 2019-2026 Kate Dowse All Rights Reserved – Do not copy or re-publish this recipe or any part of this recipe on any other blog, on social media or in a publication without the express permission of Gluten Free Alchemist

Updated Gluten Free Cheese Scones shared with
- Full Plate Thursday with Miz Helen’s Country Cottage
- Fiesta Friday with Angie


Just made these…so good..they are light an dfluffy and the wheeties loved them too! Thank you so much 😀
Thank you for your lovely comment Isa. I’m so happy that everyone loved them xx
Excellent recipe. I used flour blend A. Used a 5cm cutter which made 19 scones! Enjoyed by everyone for lunch, not just those with gluten-free requirements. It’s a 5 star recipe but try as I might, it will only let me leave 4!
Thank you so much for your lovely feedback Mary. I’m so pleased that the scones were enjoyed by everyone (gluten free or not). I’ll take that as a win!
I have no idea why the site wouldn’t let you leave 5 stars (a few other people have had the same issue though)… On the back of your comment, I’ve added the additional one from the back end. I hope that’s not too cheeky?! Let me know if that’s a problem xx
Flippin brilliant! You’ve done it again!
Thanks Cait. I hope so!! 😊♥️
Absolutely the best cheese scones – gluten free or otherwise!
Awww, thank you Su! What a lovely comment xxx
These are lovely. Excellent instructions and tips. I didn’t have sorghum flour but used millet flour instead and the scones were superb. I could taste the bicarbonate of soda so I may reduce that the next time. I used Gruyère instead of cheddar and it was very tasty. Thank you for your recipes.
Thank you SO much for your lovely feedback Joyce. I’m so pleased that you loved the scones and that they worked with the flour switch.
Re the taste of bicarb… I think some people are more aware of the flavour than others. Your best option is to replace all or some of it with more baking powder (rather than reduce it, which might impact the rise). The general rule of thumb is to use twice as much baking powder as would have been bicarb. I hope that helps.
Best wishes
Kate xx
What a brilliant flavour and so easy too. Loved by the GF family members. Especially with extra cheese.
Thanks Sisley,
I’m super-happy with this recipe xx
These look wonderful, will definitely be trying! Thanks for posting.
Thank you Jo. You’re very welcome. Enjoy xx
I’m running behind!! Thanks so much for sharing at the What’s for Dinner party last week. Hope to see you there this week too!! Enjoy the rest of the weekend.
No worries. Thank you Helen.
Have a great week x
Awesome cheese scones! Thanks for the detailed instructions and helpful information.
Thanks Janice. It was so good to finally be able to have a gluten free one that was like the real deal! x
Thanks Kate. Our Adrienne has chosen your recipe to be featured in the next Blogger’s Pit Stop.
Kathleen
Thank you so much Kathleen. That’s fabulous.
Thank you for hosting and have a great week xx
These scones were superb! Thanks for the recipe. Only trouble is I’m having trouble accessing GF oat flour – can you recommend a substitute for this recipe?
Hi Sue. So glad you loved them.
If you are having trouble accessing the oats, you have a couple of options…
1. Make the oat flour yourself by fine grinding GF oats in a blender (I do this often as it seems easier than sourcing sometimes and oats are usually available in the supermarket). I grind a whole bag and keep in an airtight container ready for use.
2. Failing that… You could try subbing with a combination of additional sorghum flour and ground almonds. Up to a max of 50g ground almonds (almond meal NOT fine almond flour). It may alter the texture a little, but should still work fine.
These sound delicious! I can’t wait to try them. All I need is the sorghum flour! Would extra sharp cheddar be a good cheese to use? Thx, Pam
Thanks Pam.
Absolutely yes… A good sharp cheddar would be perfect xx
I could have sworn I’d replied to this comment last week… But it doesn’t seem to be here… sorry!
Absolutely yes. Extra sharp cheddar is exactly what you need. It will work perfectly xx
I made these today and the whole family love them, yum
Oh fabulous. Thank you for the lovely feedback Rosemary.
I really need to update this recipe with a printable card xxx
Hi. These look delish. I have everything except buckwheat flour. What can I use instead? TIA
They should be fine if you sub for extra sorghum flour! Good luck x
These gluten-free scones are so delicious! My feature for this week's Sunday Fitness & Food! Congrats!
Thank you so much Ilka for the feature. I'm chuffed! x
I have actually never tried them. They seem delicious though and indeed as they have cheese in them they must be so addictive!
Oh no Alida! You must have some….. these are indeed, very very moreish. Just make sure they have a good strong cheese in them. x
These sound Amazing!! I am looking forward to trying them…Pinned 🙂
Thanks Angela x
Cheese scones are a favourite of mine – haven't made them for a while and now I really want a batch – well done in making them even better and I love reading your reflections on gf baking and hearing about how your expertise develops
Mine too! There is something really quite addictive about them once you have a batch in sight….
Thanks for your kind comments about my baking journey. I still feel even after 5 years that I am a complete novice. But it is a fascinating and compelling adventure, and being a bit of a perfectionist, I keep hankering for 'better'!
I love your original recipe, now to try this one. Must search around for buttermilk (live in a very small town!).
Thanks Alison. That's good to hear. I hope you do get to try this one as well. I would be interested to know whether you also think it is lighter, softer and better!
You can often find buttermilk even in the smaller supermarkets (usually lurking amongst the cream, sour cream, etc). Quite a lot of the corner stores do it down our way, so hopefully it won't be too hard to source. Let me know how you get on xx
Your scones look delicious Kate, and it's great to know that they are on the healthier side. I also whole heartedly agree that strong mature cheddar is the way forward as it has so much more flavour!
Thanks Kat. I am a big Cheddar fan (as is Miss GF) and the stronger the better!!
They look lovely. Not had a cheese scone in about 6 years! Where do you buy your sorghum from? I've found some in ethnic supermarkets but it always comes with a may contain gluten warning so have yet to try any
Thank you Katie. None in 6 years? You need to rectify that!
I get my Sorghum from the health food shop. But I know that Bobs Red Mill does it (certified GF) and I am almost certain I have seen it in Holland & Barrett!
I love cheese scones and yours look really delicious. I like how you've mixed up the different types of flour too. I often do that so my kids get some different grains in their tummies. Thanks for linking up with #CookBlogShare
Thanks Mandy. The trouble with gluten free baking is that there is no one flour that does it all, so it is always a case (for me at least) of carefully blending and reworking to get the desired end-crumb! I'm a bit of a stickler when it comes to texture!! x
They really do look fantastic, I've been hankering for some savoury scones but haven't got round to making any yet
Thanks Shaheen. Savoury scones are great aren't they? And perfect for packed lunches too!